
티스토리 뷰
Role
디렉터리 형태로
구조화 시킨다
▶ Role을 위한 yaml 생성
- hosts: centos
  become: yes
  vars:
    package: httpd
  tasks:
    - name: installed {{package}} package
      yum:
        name: "{{package}}"
        state: present
    - name: started apache service
      service:
        name: httpd
        state: started
    - name: copy httpd
      copy:
        src: ./src/httpd.conf
        dest: /etc/httpd/conf/httpd.conf
      notify: restart apache
    - name: copy index.html file to managed nodes with jinja2 template
      template:
        src: src/index.j2
        dest: /var/www/html/index.html
    - name: copy first.html file to manged nodes
      copy:
        src: ./src/first.html
        dest: /var/www/html/first.html

  handlers:
    - name: restart apache
      service:
        name: httpd
        state: restarted
[vagrant@control src]$ cat first.html
default page
[vagrant@control src]$ cat index.j2
what .... {{ansible_host}}
ip....... {{ansible_all_ipv4_addresses}}
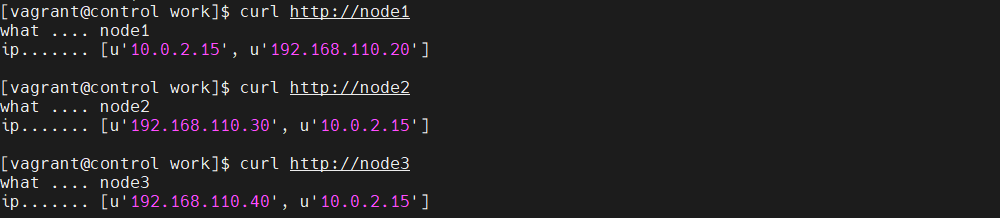
>> 결과
[vagrant@control src]$ curl http://node1
what .... node1
ip....... [u'10.0.2.15', u'192.168.110.20']

[vagrant@control src]$ curl http://node2
what .... node2
ip....... [u'192.168.110.30', u'10.0.2.15']

[vagrant@control src]$ curl http://node3
what .... node3
ip....... [u'192.168.110.40', u'10.0.2.15']
▶ Role 을 위한 Directory 생성
>> 여러가지 디렉터리가 필요하다
[vagrant@control work]$ mkdir roles
[vagrant@control work]$ cd roles/

[vagrant@control roles]$ mkdir tasks meta handlers vars test default
[vagrant@control roles]$ ll
total 0
drwxrwxr-x. 2 vagrant vagrant 6 Feb 21 10:43 default
drwxrwxr-x. 2 vagrant vagrant 6 Feb 21 10:43 handlers
drwxrwxr-x. 2 vagrant vagrant 6 Feb 21 10:43 meta
drwxrwxr-x. 2 vagrant vagrant 6 Feb 21 10:43 tasks
drwxrwxr-x. 2 vagrant vagrant 6 Feb 21 10:43 test
drwxrwxr-x. 2 vagrant vagrant 6 Feb 21 10:43 vars
▷ 하지만 자동으로 생성하기엔 힘들다
>> 이름 바꿔서는 안된다
[vagrant@control roles]$ ansible-galaxy init apache
- Role apache was created successfully
[vagrant@control roles]$ ll
total 0
drwxrwxr-x. 10 vagrant vagrant 154 Feb 21 10:46 apache
[vagrant@control roles]$ cd apache/
[vagrant@control apache]$ ll
total 4
drwxrwxr-x. 2 vagrant vagrant 22 Feb 21 10:46 defaults
drwxrwxr-x. 2 vagrant vagrant 6 Feb 21 10:46 files
drwxrwxr-x. 2 vagrant vagrant 22 Feb 21 10:46 handlers
drwxrwxr-x. 2 vagrant vagrant 22 Feb 21 10:46 meta
-rw-rw-r--. 1 vagrant vagrant 1328 Feb 21 10:46 README.md
drwxrwxr-x. 2 vagrant vagrant 22 Feb 21 10:46 tasks
drwxrwxr-x. 2 vagrant vagrant 6 Feb 21 10:46 templates
drwxrwxr-x. 2 vagrant vagrant 39 Feb 21 10:46 tests
drwxrwxr-x. 2 vagrant vagrant 22 Feb 21 10:46 vars
▷ 모두 붙여서 써야 한다
# set shiftwidth=4 로 설정해서 한번에 옮긴다
# shift + v , shift + <
>> 해당 디렉터리에 적혀있는 부분은 쓰지 않는다
>> ex> tasks dir의 main.yml 에서 - tasks: 빼고 옮긴다
>>> 경로 주의 >>> 수정 전


>> 관련 파일들은 files 디렉터리에 모두 복사한다
>>> index.j2 는 templates directory 에 옮겨야 함.... 잘못 옮긴 내용
>>> files directory 에 넣은 상태로 playbook 돌리면 오류가 난다 (못찾는다)
[vagrant@control files]$ pwd
/home/vagrant/work/roles/apache/files
[vagrant@control files]$ ll
total 20
-rw-rw-r--. 1 vagrant vagrant    13 Feb 21 11:01 first.html
-rw-r--r--. 1 vagrant vagrant 11753 Feb 21 11:01 httpd.conf
-rw-rw-r--. 1 vagrant vagrant    69 Feb 21 11:01 index.j2
>> 변수 설정을 안했을 때에는 default directory 를 참조한다
>> 변수는 vars directory에 넣는게 좋다

▷ 파일 경로를 잘 확인해야 한다
>> 경로를 안쓰면 알아서 files directory 에서 찾는다
---
# tasks file for apache
- name: installed {{package}} package
  yum:
    name: "{{package}}"
    state: present
- name: started apache service
  service:
    name: httpd
    state: started
- name: copy httpd
  copy:
    src: httpd.conf
    dest: /etc/httpd/conf/httpd.conf
  notify: restart apache
- name: copy index.html file to managed nodes with jinja2 template
  template:
    src: index.j2
    dest: /var/www/html/index.html
- name: copy first.html file to manged nodes
  copy:
    src: first.html
    dest: /var/www/html/first.html
# tests / meta 는 딱히 필요한건 아니다
>> 아래 내용은 ./meta/main.yml

▶ role 이름은 directory 명이며, 여러개 쓸 수 있다
>> 기존의 내용은 다 지워도 된다
>>> 이미 roles 디렉터리에 만들어 놨다
- hosts: centos
  become: yes
  roles:
    - apache
◇ 확인을 위해 apache 삭제
ansible centos -m yum -a 'name=httpd state=absent' --become
>> templates directory 에 index.j2 를 옮겨야 한다

>> 정상 작동
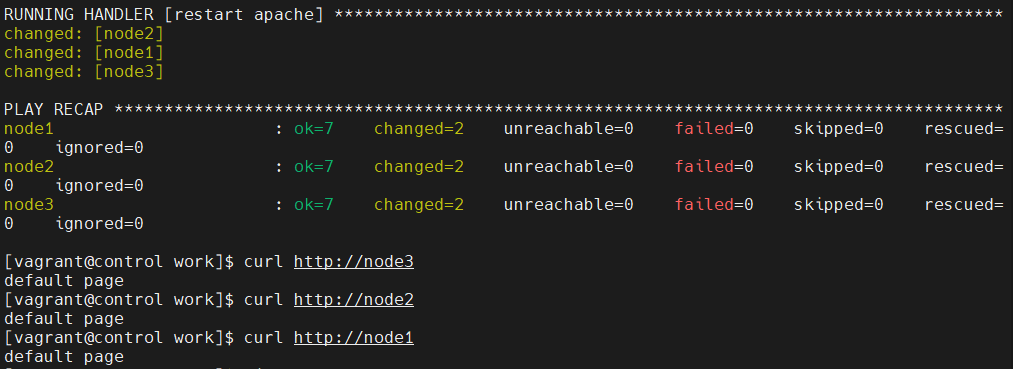
>> ~/work/roles/apache/files/httpd.conf 수정
>>> handlers 작동 후 정상 출력

▶ 화면에 출력하기 위한 role 생성
[vagrant@control work]$ ansible-galaxy init roles/display-msg
- Role roles/display-msg was created successfully
[vagrant@control tasks]$ cat main.yml
---
# tasks file for roles/display-msg
- debug:
msg: messages in task directory in role
>> tasks: 에 debug 도 넣고 미리 만든 role 도 넣는다
>>> 근데 이렇게 한줄로 쓰면 syntax 에러가 뜬다
- hosts: localhost
  roles: display-msg
  tasks:
    - debug:
        msg: messages in tasks
>>> 세로쓰기로는 됨...
- hosts: localhost
  roles:
    - display-msg
  tasks:
    - debug:
        msg: messages in tasks
▶ 적힌 순서랑 상관없이 role 부터 실행한다
- hosts: localhost
  tasks:
    - debug:
        msg: messages in tasks
  roles:
    - display-msg
▶ pre_tasks / post_tasks 로 순서 바꿔줄 수 있다
- hosts: localhost
  pre_tasks:
    - debug:
        msg: messages in pre_tasks
  roles:
    - display-msg
  post_tasks:
    - debug:
        msg: messages in post_task
▶ 1. pre_tasks / 2. roles / 3. tasks / 4. post_tasks
- hosts: localhost
  pre_tasks:
    - debug:
        msg: messages in pre_tasks
  roles:
    - display-msg
  post_tasks:
    - debug:
        msg: messages in post_task
  tasks:
    - debug:
        msg: messages in tasks
▶ ansible galaxy 활용
https://galaxy.ansible.com/ui/standalone/roles/jdauphant/nginx/documentation/
Ansible Galaxy
galaxy.ansible.com
ansible-galaxy install jdauphant.nginx
● 하지만, /home/vagrant/.ansible 에 설치되므로 내가 원하는 디렉터리에 바꾸기 위해
>> ansible.cfg 를 수정

>> 포트 충돌날 수도 있으므로, 삭제
ansible centos -m yum -a 'name=httpd state=absent' --become
>> 실행 yaml 파일은 만들어야 한다
[vagrant@control work]$ cat jda.nginx.yaml
- hosts: centos
  become: yes
  roles:
    - jdauphant.nginx
>> nginx 가 안뜨고 centOS 가 뜬다
>> 근데 ubuntu node 4 , 5 는 제대로 뜬다


▶ /home/vagrant/work/roles/jdauphant.nginx/tasks/main.yml 에 내용 추가
>> 2번 playbook 돌리면 된다
>> 강제로 돌리는 것 좋은 방법은 아니다
- get_url:
    url: https://www.nginx.com
    dest: /usr/share/nginx/html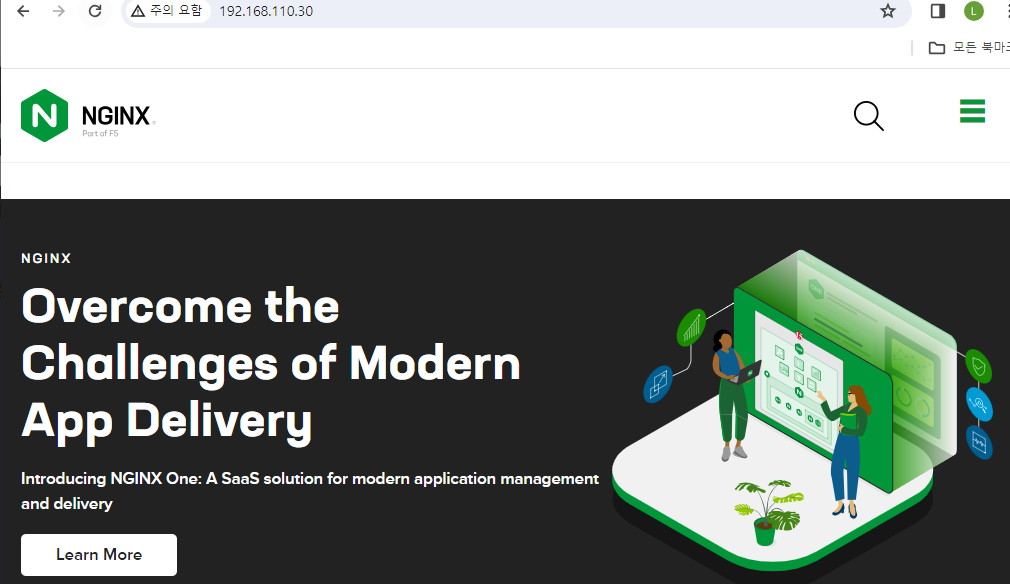
▷ playbook 실행할 때에 자세히 실행을 보려면 -v 옵션을 넣으면 된다
>> v 를 많이 쓸 수록 더 자세히 보여 준다
>> v 4개 까지 가능
>> verbosity
ansible-playbook vhost.yml -v
♠ 참조
https://galaxy.ansible.com/ui/standalone/roles/
Ansible Galaxy
galaxy.ansible.com
'Ansible' 카테고리의 다른 글
| Role 실습 (0) | 2024.02.22 |
|---|---|
| command 와 shell 의 차이 (0) | 2024.02.21 |
| Template ( 템플릿 ) (0) | 2024.02.20 |
| Handlers 추가내용 (0) | 2024.02.20 |
| fact 변수 활용 (0) | 2024.02.20 |