티스토리 뷰
Vagrantfile
● vm.define 과 vm.name 은 중복되면 안된다


○ Ruby 언어로 되어있다
○ vb.gui = false 는 vagrant 실행시에 콘솔이 안뜬다
○ 첫번째 랜카드는 자동으로 NAT 로 잡힌다
○ cfg.vm.provision 위까지의 내용은 H/W 내용
○ privileged: true 가 default 이며, root 권한으로 실행한다는 의미
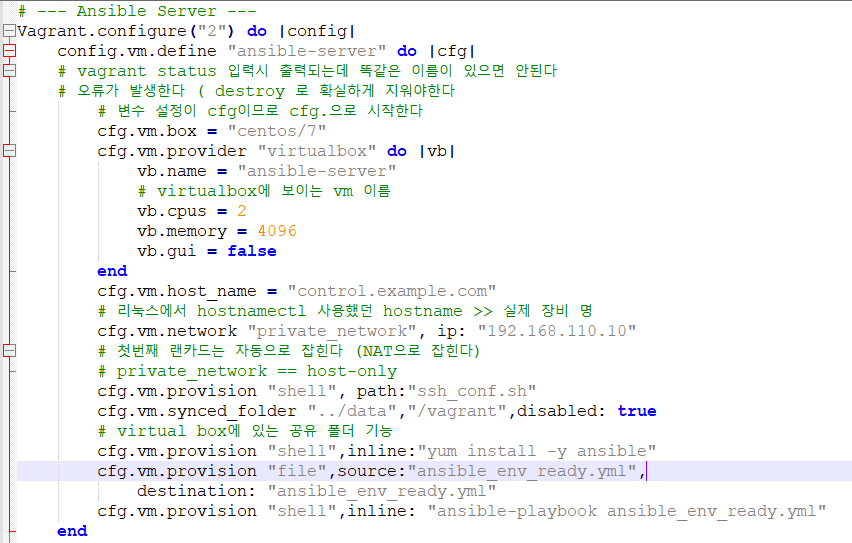
cfg.vm.provision "shell", path:"ssh_conf.sh", privileged:true# --- Ansible Server ---
Vagrant.configure("2") do |config|
config.vm.define "ansible-server" do |cfg|
# vagrant status 입력시 출력되는데 똑같은 이름이 있으면 안된다
# 오류가 발생한다 ( destroy 로 확실하게 지워야한다
# 변수 설정이 cfg이므로 cfg.으로 시작한다
cfg.vm.box = "centos/7"
cfg.vm.provider "virtualbox" do |vb|
vb.name = "ansible-server"
# virtualbox에 보이는 vm 이름
vb.cpus = 2
vb.memory = 4096
vb.gui = false
end
cfg.vm.host_name = "control.example.com"
# 리눅스에서 hostnamectl 사용했던 hostname >> 실제 장비 명
cfg.vm.network "private_network", ip: "192.168.110.10"
# 첫번째 랜카드는 자동으로 잡힌다 (NAT으로 잡힌다)
# private_network == host-only
cfg.vm.provision "shell", path:"ssh_conf.sh"
cfg.vm.synced_folder "../data","/vagrant",disabled: true
# virtual box에 있는 공유 폴더 기능
end
# --- managed node 1 ---
config.vm.define "managed-node1" do |cfg|
cfg.vm.box = "centos/7"
cfg.vm.provider "virtualbox" do |vb|
vb.name = "node1"
vb.cpus = 1
vb.memory = 2048
vb.gui = false
end
cfg.vm.host_name = "node1.example.com"
cfg.vm.network "private_network", ip: "192.168.110.20"
cfg.vm.provision "shell", path:"ssh_conf.sh"
cfg.vm.synced_folder "../data","/vagrant",disabled: true
end
# --- managed node 2 ---
config.vm.define "managed-node2" do |cfg|
cfg.vm.box = "centos/7"
cfg.vm.provider "virtualbox" do |vb|
vb.name = "node2"
vb.cpus = 1
vb.memory = 2048
vb.gui = false
end
cfg.vm.host_name = "node2.example.com"
cfg.vm.network "private_network", ip: "192.168.110.30"
cfg.vm.provision "shell", path:"ssh_conf.sh"
cfg.vm.synced_folder "../data","/vagrant",disabled: true
end
# --- managed node 3 ---
config.vm.define "managed-node3" do |cfg|
cfg.vm.box = "centos/7"
cfg.vm.provider "virtualbox" do |vb|
vb.name = "node3"
vb.cpus = 1
vb.memory = 2048
vb.gui = false
end
cfg.vm.host_name = "node3.example.com"
cfg.vm.network "private_network", ip: "192.168.110.40"
cfg.vm.provision "shell", path:"ssh_conf.sh"
cfg.vm.synced_folder "../data","/vagrant",disabled: true
end
end
● powershell 에서 vagrant 관련 명령어
| vagrant init | 프로비저닝을 위한 예제 스크립트 생성 |
| vagrant up | vagrant 파일을 읽어 들여 프로비저닝을 실행 |
| vagrant halt | vagrant에서 다루는 가상머신들을 종료 |
| vagrant destroy | 가상머신 삭제 |
| vagrant ssh | 가상머신에 ssh로 접속 |
| vagrant provision | 가상머신에 변경된 설정 적용 |
| vagrant status | 가상머신 상태 확인 |
| vagrant box list | 다운 받은 box 확인 |
| vagrant box add 명칭 | box 다운로드 |
○ 하위 디렉터리가 아닌 부모 디렉터리부터 찾아서 명령어 실행된다
◎ window 로 백업
PS C:\Users\soldesk\ansible_backup> sftp vagrant@192.168.110.10
sftp> ls
examples                vagrant_example.tar     vagrant_work.tar        work
sftp> pwd
Remote working directory: /home/vagrant
sftp> get vagrant_work.tar
Fetching /home/vagrant/vagrant_work.tar to vagrant_work.tar
/home/vagrant/vagrant_work.tar                     100%   40KB  13.3MB/s   00:00
sftp> get vagrant_example.tar
Fetching /home/vagrant/vagrant_example.tar to vagrant_example.tar
/home/vagrant/vagrant_example.tar                  100%   60KB  20.0MB/s   00:00

PS C:\Users\soldesk\ansible_backup> sftp opuser@192.168.110.10
sftp> ls
opuser_sample.tar   sample
sftp> get opuser_sample.tar
Fetching /home/opuser/opuser_sample.tar to opuser_sample.tar
/home/opuser/opuser_sample.tar                     100%   20KB   6.7MB/s   00:00
sftp> ls
opuser_sample.tar   sample
sftp> exit
PS C:\Users\soldesk\ansible_backup> ls


    디렉터리: C:\Users\soldesk\ansible_backup


Mode                 LastWriteTime         Length Name
----                 -------------         ------ ----
-a----        2024-02-15  오전 10:58          20480 opuser_sample.tar
-a----        2024-02-15  오전 10:57          61440 vagrant_example.tar
-a----        2024-02-15  오전 10:57          40960 vagrant_work.tar
● VM 삭제
PS C:\Users\soldesk\ansible\centos> vagrant halt
==> managed-node3: Attempting graceful shutdown of VM...
==> managed-node2: Attempting graceful shutdown of VM...
==> managed-node1: Attempting graceful shutdown of VM...
==> ansible-server: Attempting graceful shutdown of VM...
PS C:\Users\soldesk\ansible\centos> vagrant destroy
    managed-node3: Are you sure you want to destroy the 'managed-node3' VM? [y/N] y
==> managed-node3: Destroying VM and associated drives...
    managed-node2: Are you sure you want to destroy the 'managed-node2' VM? [y/N] y
==> managed-node2: Destroying VM and associated drives...
    managed-node1: Are you sure you want to destroy the 'managed-node1' VM? [y/N] y
==> managed-node1: Destroying VM and associated drives...
    ansible-server: Are you sure you want to destroy the 'ansible-server' VM? [y/N] y
==> ansible-server: Destroying VM and associated drives...
>> 그대로 남아있다

>> .vargrant 도 삭제
● 새로 만들기 전 내용 추가
cfg.vm.provision "shell",inline:"yum install -y ansible"
cfg.vm.provision "file",source:"ansible_env_ready.yml",
	destination: "ansible_env_ready.yml"
cfg.vm.provision "shell",inline: "ansible-playbook ansible_env_ready.yml"
▶ Vagrantfile 에 입력된 ansible_env-ready.yml 파일로 입력
( 저장 위치는 file과 동일 위치 )
▷ shell 모듈은 command 모듈과 같으나, command 처럼 디폴트가 아니다
▷ lineinfile 모듈은 내용을 바로 추가할 수 있는 모듈
---
- name: setup for the ansible's environment
  hosts: localhost
  gather_facts: no
  tasks:
    - name: create vim env's directories & files
      shell: "{{item}}"
      loop:
        - "touch /home/vagrant/.vimrc"
        - "touch /home/vagrant/.bashrc"

    - name: install vim-enhanced and git
      yum:
        name:
            - vim-enhanced
            - git
        state: present

    - name: configure .vimrc
      lineinfile:
        path: /home/vagrant/.vimrc
        line: autocmd FileType yaml setlocal ts=2 shiftwidth=2 sts=2 expandtab ai
    - name: configure .bashrc
      lineinfile:
        path: /home/vagrant/.bashrc
        line: "{{item}}"
      loop:
       - "alias ans='ansible'"
       - "alias anp='ansible-playbook'"
       - "alias anc='ansible-playbook --syntax-check'"
▶ provision 부분이 제대로 인식이 안 되어 있다
>> up 이 아닌 provision 으로 vm.define 이름을 적어준다
PS C:\Users\soldesk\ansible\centos> vagrant provision ansible-server

>> ansible 설치 위에 해당 29버전 설치 추가
cfg.vm.provision "shell",inline:"yum install -y centos-release-ansible-29.noarch"
cfg.vm.provision "shell",inline:"yum install -y ansible"
>> 로그인한 상태로 provision 했으므로 source .bashrc 로 alias 적용
[vagrant@control ~]$ ans --version
-bash: ansilbe: command not found
[vagrant@control ~]$ source .bashrc
[vagrant@control ~]$ ans --version
ansible 2.9.27
  config file = /etc/ansible/ansible.cfg
  configured module search path = [u'/home/vagrant/.ansible/plugins/modules', u'/usr/share/ansible/plugins/modules']
  ansible python module location = /usr/lib/python2.7/site-packages/ansible
  executable location = /usr/bin/ansible
  python version = 2.7.5 (default, Apr  2 2020, 13:16:51) [GCC 4.8.5 20150623 (Red Hat 4.8.5-39)]
▶nginx 설치 및 삭제
>> nginx.yaml
>>> root 권한 주는 become
---
- hosts: centos
  gather_facts: no
  become: yes
  tasks:
    - yum:
        name: epel-release
        state: latest
    - yum:
        name: nginx
        state: present
    - get_url:
        url: https://www.nginx.com
        dest: /usr/share/nginx/html
        mode: 0644
    - service:
        name: nginx
        state: started
▩ permission 오류

▶ -k 옵션 필요 ask-pass
>> 공개키 안했으므로 비밀번호 입력해서 넘어가야한다
[vagrant@control work]$ anp ngnx.yml -k
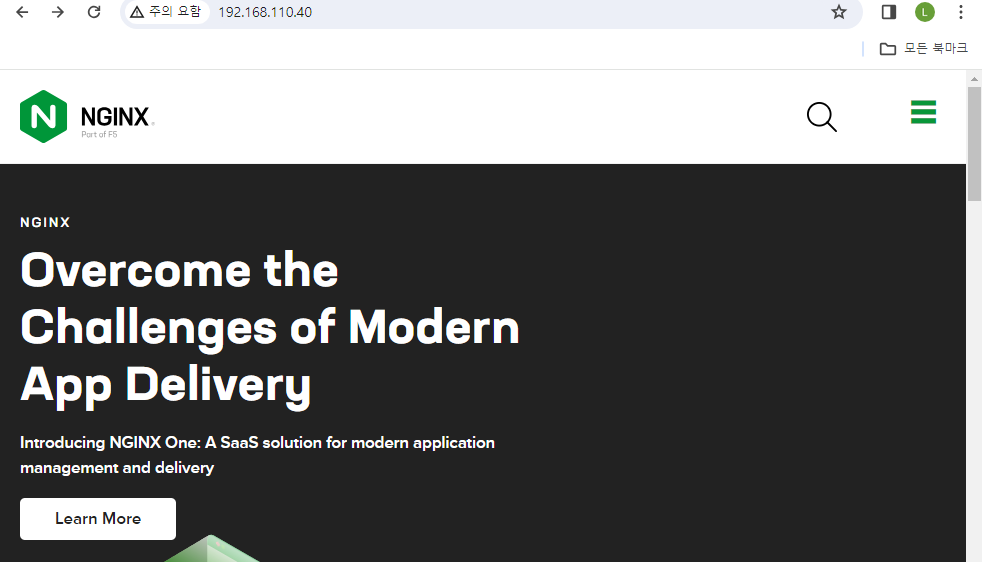
>> 사이트 띄워진다

>> 누르면 원래 nginx 홈페이지로 이동된다

▶ 삭제
>> ask-pass: yes 로 실행시 -k 옵션 빼도 된다
>>> 넣으면 ask-pass 로 실행이 안된다 그냥 빼야한다
- hosts: centos
  gather_facts: no
  become: yes
  ask-pass: yes
  tasks:
    - yum:
        name: epel-release
        state: absent
    - yum:
        name: nginx
        state: absent
▶ 시간 변경
- hosts: localhost
  gather_facts: no
  become: yes
  tasks:
    - timezone:
        name: Asia/Seoul
◎ NFS 클라이언트 구성
vagrant box add sysnet4admin/windows2016
vagrant box add generic/ubuntu2204
▶ vim 에서 한번에 블록 지정해서 이동시키기
vim 에서 visual mode 사용
블록지정 : Shift + v
화살표로 블록 크기 설정
ShiftWidth 설정 만큼 이동 : Shift < or >
▶ nfs.yaml
- hosts: localhost
  gather_facts: no

  tasks:
    - file:
        path: /home/vagrant/nfs_shared
        state: directory
        mode: 0755
    - become: yes
      lineinfile:
         path: /etc/exports
         line: /home/vagrant/nfs_shared 192.168.110.0/24(rw,no_root_squash,sync)
    - become: yes
      service:
         name: nfs
         state: restarted

- hosts: centos
  gather_facts: no

  tasks:
    - file:
        path: /home/vagrant/nfs
        state: directory
    - become: yes
      mount:
        path: /home/vagrant/nfs
        src: 192.168.110.10:/home/vagrant/nfs_shared
        fstype: nfs
        opts: nfsvers=4
        state: mounted
### /etc/exports 에 넣는 이유 : 마운트를 위해 잠깐 권한을 넣어주는 것
▩ opts: nfsvers=4 에서는 mount 오류 발생
>> 3 으로 바꾸면 된다

>> /etc/exports 에 2줄이 되어있었다
/home/vagrant/nfs_shared 192.168.110.0/24(rw,sync)
/home/vagrant/nfs_shared 192.168.110.0/24(rw,no_root_squash,sync)
● generic/ubuntu2204 의 node 4, node 5 를 추가한다
>> server, node {1..3} 이 있는 Vagrantfile 밑에 추가한다
>> ubuntu 는 provision 비밀번호가 필요없다??
# --- managed node 4 - ubuntu 22.04 ---
	config.vm.define "managed-node4" do |cfg|
		cfg.vm.box = "generic/ubuntu2204"
		cfg.vm.provider "virtualbox" do |vb|
			vb.name = "node4"
			vb.cpus = 1
			vb.memory = 2048
			vb.gui = false
		end
		cfg.vm.host_name = "node4.example.com"
				cfg.vm.network "private_network", ip: "192.168.110.50"
				#cfg.vm.provision "shell", path:"ssh_conf.sh"
				cfg.vm.synced_folder "../data","/vagrant",disabled: true
	end
# --- managed node 5 - ubuntu 22.04 ---
	config.vm.define "managed-node5" do |cfg|
		cfg.vm.box = "generic/ubuntu2204"
		cfg.vm.provider "virtualbox" do |vb|
			vb.name = "node5"
			vb.cpus = 1
			vb.memory = 2048
			vb.gui = false
		end
		cfg.vm.host_name = "node5.example.com"
				cfg.vm.network "private_network", ip: "192.168.110.60"
				#cfg.vm.provision "shell", path:"ssh_conf.sh"
				cfg.vm.synced_folder "../data","/vagrant",disabled: true
	end
>> ansible_env_ready.yml 파일에도 node4,5 추가해준다
## blockinfile 은 여러 줄을 추가 할 때 사용한다
## path 는 mandatory 이고, block: | 는 각각 한줄 씩 처리한다는 뜻이다
    - name: add "/etc/hosts"
      blockinfile:
        path: /etc/hosts
        block: |
            192.168.110.20  node1.example.com   node1
            192.168.110.30  node2.example.com   node2
            192.168.110.40  node3.example.com   node3
            192.168.110.50  node4.example.com   node4
            192.168.110.60  node5.example.com   node5

    - name: add "/etc/ansible/hosts"
      blockinfile:
        path: /etc/ansible/hosts
        block: |
            [centos]
            node1
            node2
            node3
            [ubuntu]
            node4
            node5
>> node4 , node5 만 up 해준다
vagrant up managed-node4
vagrant up managed-node5
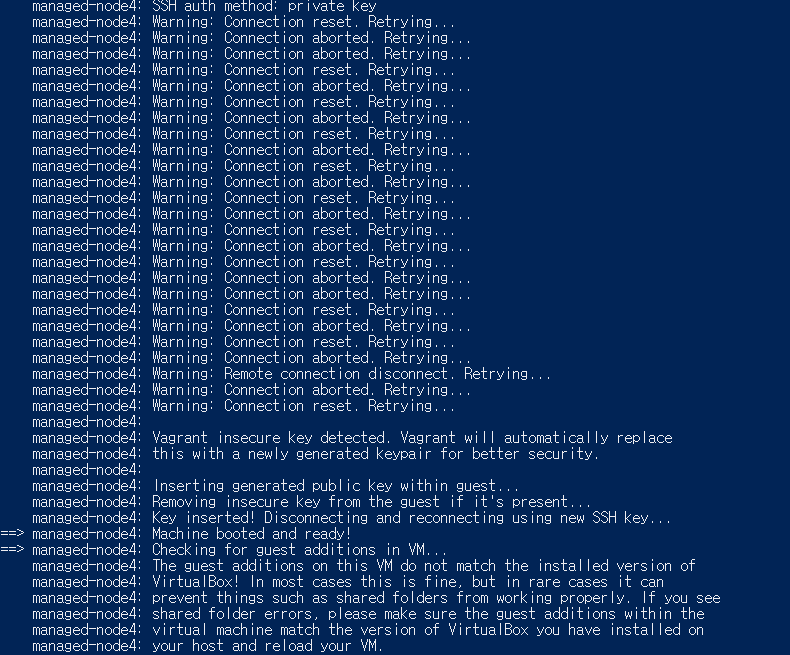
▩ key 잘 안 만들어진다

>> vagrant plugin 설치하면 빠르게 key 가 만들어진다
>>>> 근데 별 차이가 없다
vagrant plugin install vagrant-vbguest
>> provision
vagrant provision ansible-server
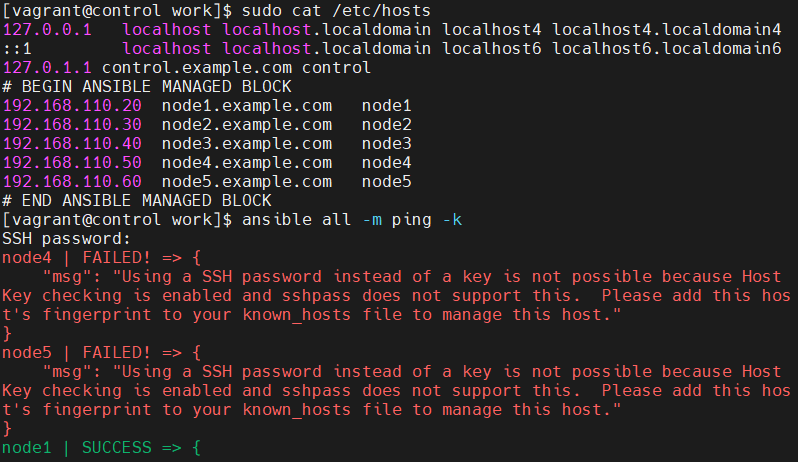
▩ fingerprint 수집 안되어서 오류 발생
>>> ssh node4 / ssh node5 로 해결

▶ nfs.yaml 에 ubuntu 그룹 추가
>> 밑부분에 hosts 에도 한번 여러개를 넣어줄 수 있다
- hosts:
    - centos
    - ubuntu
  gather_facts: no

  tasks:
    - file:
        path: /home/vagrant/nfs
        state: directory
    - become: yes
      mount:
        path: /home/vagrant/nfs
        src: 192.168.110.10:/home/vagrant/nfs_shared
        fstype: nfs
        opts: nfsvers=4
        state: mounted
▦ ubuntu 에는 mount-util 이 없다

>> ubuntu 는 yum, dnf 가 아니라, apt 를 사용해야 한다
vagrant@node4:~$ dnf list nfs
Command 'dnf' not found, but can be installed with:
apt install dnf
Please ask your administrator.
>> fact 변수 확인
ansible node5 -m setup -k > node5.fact
ansible_os_family: "Debian"ansible_os_family: "RedHat"
▩ when 다음 변수는 " " 안쓰는 거였다... 오류 엄청 나옴...
- hosts: localhost
  gather_facts: no

  tasks:
    - file:
        path: /home/vagrant/nfs_shared
        state: directory
        mode: 0755
    - become: yes
      lineinfile:
         path: /etc/exports
         line: /home/vagrant/nfs_shared 192.168.110.0/24(rw,no_root_squash,sync)
    - become: yes
      service:
         name: nfs
         state: restarted

- hosts:
    - centos
    - ubuntu
  become: yes
  tasks:
    - apt:
        name: nfs-common
        update_cache: yes
        state: present
      when: ansible_facts.os_family == 'Debian'
    - yum:
        name: nfs-utils
        state: present
      when: ansible_facts.os_family == 'Redhat'
    - file:
        path: /home/vagrant/nfs
        state: directory
    - become: yes
      mount:
        path: /home/vagrant/nfs
        src: 192.168.110.10:/home/vagrant/nfs_shared
        fstype: nfs
        opts: nfsvers=4
        state: mounted
## 강사님이 하신 방법 ##
when: ansible_facts['os_family'] == "RedHat"
'Ansible' 카테고리의 다른 글
| windows nginx 실행 안된다 (0) | 2024.02.19 |
|---|---|
| Ansible 총정리2 (0) | 2024.02.16 |
| Ansible 변수 추가내용 (0) | 2024.02.14 |
| yaml [ playbook ] (0) | 2024.02.13 |
| Ansible module (0) | 2024.02.13 |
