티스토리 뷰
▶ powershell 로 켜니까 하루 종일걸린다...
>> centos 는 key 못 가져 와서 종일 저러고..

>> ubuntu 는 종일 저러고있고..

>>> 모두 켜는데 30분도 더 걸림..
>>> virtual box 로 하나하나 켜도 된다던데 그러면 콘솔창 켜놔야되잖아...
▷ 끌때에는 이왕이면 server를 나중에 끄자
[ nfs 마운트가 되어있으므로 ]
>> ansible-server 에서 이 부분은 빼도 된다 >> 이미 다운로드 되어있다
cfg.vm.provision "shell",inline:"yum install -y centos-release-ansible-29.noarch"
cfg.vm.provision "shell",inline:"yum install -y ansible"
윈도우 node6 추가
◎ window node 에는 방화벽을 꺼야한다
# --- managed node 6 - windows2016 ---
	config.vm.define "managed-node6" do |cfg|
		cfg.vm.box = "sysnet4admin/Windows2016"
		cfg.vm.provider "virtualbox" do |vb|
			vb.name = "node6"
			vb.cpus = 1
			vb.memory = 2048
			vb.gui = true
		end
		cfg.vm.host_name = "node6"
				cfg.vm.network "private_network", ip: "192.168.110.70"
				cfg.vm.provision "shell", inline: "netsh advfirewall set allprofiles state off"
				cfg.vm.synced_folder "../data","/vagrant",disabled: true
	end
▷ vagrant 는 =begin =end 로 여러줄 주석 처리 가능

▷ ansible_env_ready.yml 에 node6 추가

▷ Alt + Shift + delete 눌러서 잠금 푼다

>>> 여기 있었다...

>> /etc/hosts 와 /etc/ansible/hosts를 위해
vagrant provision ansible-server
▩ 윈도우를 위한 ping 모듈은 다르다
>> 기본값으로 ssh 프로토콜은 사용했으나, window 는 WinRM (Windows Remote Management)를 사용 권장
>> window 는 WinRM 프로토콜 + WinRM 의 포트 5985 + 사용자 vagrant 필요

▷ /etc/ansible/hosts 수정
[centos]
node1
node2
node3
[ubuntu]
node4
node5
[windows]
node6   ansible_connection=winrm ansible_user=vagrant ansible_port=5985
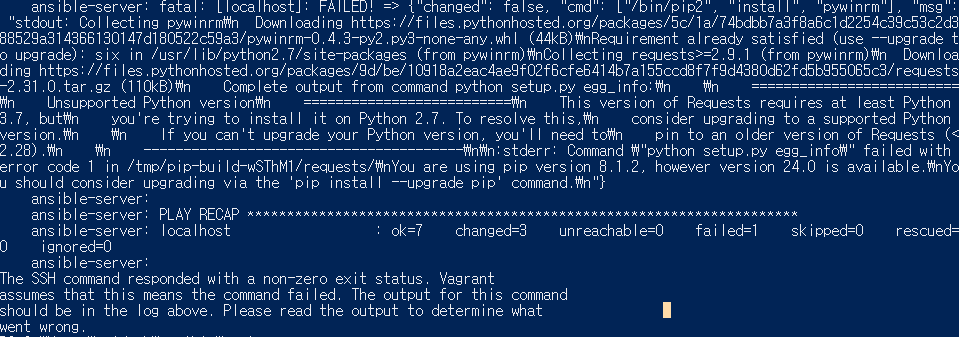
▤ winrm 설치가 안되어 있다

▤ python 버전이 달라서 설치가 안된다...
####### add winrm for windows
    - yum:
        name:
            - epel-release
            - python-pip
        state: present
    - pip:
        name: pywinrm
        state: present
########
## vim 에서 들여쓰기 위치 확인법
set cursorcolumn
▷ 버전 맞추기가 쉽지 않은데, yum list에 존재하므로, 바로 그냥 설치하자

▶ 추가하면 문제없이 window 에도 핑이 간다
>> node6 에 추가되어야 한다
>> linux 라는 그룹으로 node[1:5]까지 한번에 묶을 수 있다
blockinfile:
        path: /etc/ansible/hosts
        block: |
            [centos]
            node1
            node2
            node3
            [ubuntu]
            node4
            node5
            [windows]
            node6   ansible_connection=winrm ansible_user=vagrant ansible_port=5985
            [linux]
            node[1:5]
>> 가장 아래에 추가
>>> 근데 python-pip 는 yum search 로 안뜬다 다운로드도 안됐고..
####### add winrm for windows
    - yum:
        name:
            - epel-release
            - python-pip
        state: present
    - yum:
        name: python2-winrm
        state: present
########
>> list 에 호스트 중첩인데 중첩되어 뜨지 않으므로 문제 없다
[vagrant@control work]$ ansible all --list
  hosts (6):
    node6
    node1
    node2
    node3
    node4
    node5
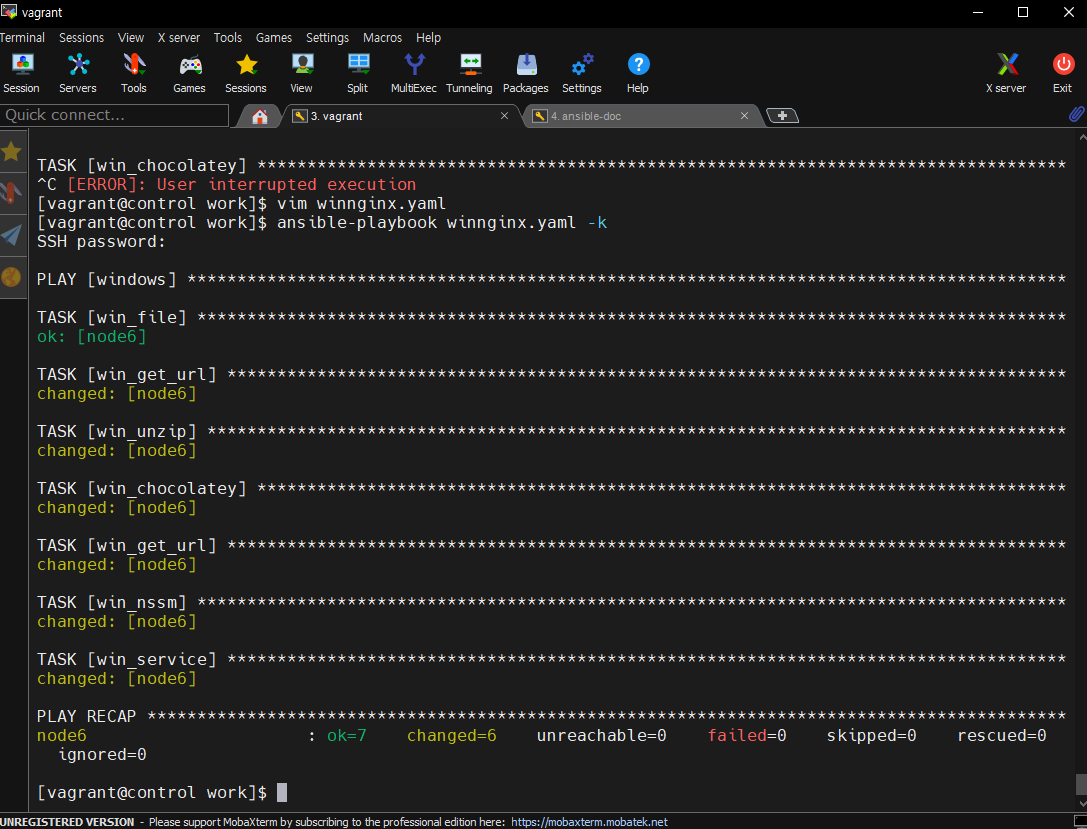
windows node6 nginx
>> delete_archive 는 알집 다운로드 하고 풀고 알집은 삭제하라는 의미이다
- hosts: windows
  gather_facts: no

  tasks:
    - win_file:
        path: C:\nginx
        state: directory
    - win_get_url:
        url: http://nginx.org/download/nginx-1.14.0.zip
        dest: C:\nginx\nginx-1.40.0.zip
    - win_unzip:
        src: C:\nginx\nginx-1.40.0.zip
        dest: C:\nginx
        delete_archive: yes
    - win_chocolatey:
        name: nssm
    - win_get_url:
        url: https://www.nginx.com
        dest: C:\nginx\nginx-1.14.0\html\index.html
    - win_nssm:
        name: nginx
        application: C:\nginx\nginx-1.14.0\nginx.exe
        state: present
    - win_service:
        name: nginx
        state: restarted
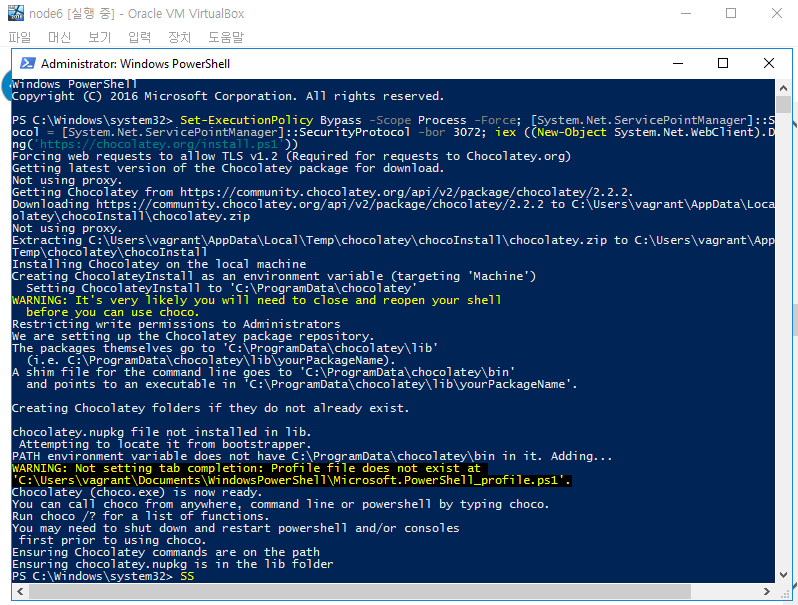
▤ win_chocolatey 에서 안넘어간다
>> window 용 패키지 관리자

>> node6 은 원본 os 에서 복사 붙여넣기가 안 되고...
https://green.cloud/docs/how-to-install-chocolatey-on-windows-server-2012-2019/
How to Install Chocolatey on Windows Server 2012, 2019 - GreenCloud Documentation
Introduction Chocolatey or Choco as it is sometimes referred to is a free, open-source package manager for Windows that is very similar to Apt or DNF in the Linux realm. In other words, this is a program used for installing software via the Windows command
green.cloud
>> node6 의 powershell 을 관리자 권한으로 켜놓고
>> node6 에서 홈페이지 이동하여 option2를 복사 붙여넣기....
>>> 복붙에 해당하는 내용...
Set-ExecutionPolicy Bypass -Scope Process -Force; [System.Net.ServicePointManager]::SecurityProtocol = [System.Net.ServicePointManager]::SecurityProtocol -bor 3072; iex ((New-Object System.Net.WebClient).DownloadString('https://chocolatey.org/install.ps1'))
>> 직접 node 6 에서 chocolatey 설치 ( 중간에 리붓하라고 해서 리붓후 재설치 진행 )


>> 원본 OS 의 web 에서 node 6 ip 로 출력

◎ node 6 win 시간 설정
>> window 는 win_timezone 모듈에 timezone 을 적는다
>> linux 는 timezone 모듈에 name
- hosts:
    - linux
    - localhost
  gather_facts: no
  become: yes
  tasks:
    - timezone:
        name: Asia/Seoul
- hosts: windows
  gather_facts: no
  #become: yes
  tasks:
    - win_timezone:
    	timezone: 'korea standard time'
        #timezone: Asia/Seoul
>> windows 에는 become 안되는구나...
>> Asia/Seoul 이 아니라... 'korea standard time' 이다;;;

▷ windows 에 z 생성되었는지 확인
- hosts: localhost
  gather_facts: no

  tasks:
    - file:
        path: /home/vagrant/nfs_shared
        state: directory
        mode: 0755
    - become: yes
      lineinfile:
         path: /etc/exports
         line: /home/vagrant/nfs_shared 192.168.110.0/24(rw,no_root_squash,sync)
    - become: yes
      service:
         name: nfs
         state: restarted

- hosts:
    - centos
    - ubuntu
  become: yes
  tasks:
    - apt:
        name: nfs-common
        update_cache: yes
        state: present
      when: ansible_facts.os_family == 'Debian'
    - yum:
        name: nfs-utils
        state: present
      when: ansible_facts.os_family == 'Redhat'
    - file:
        path: /home/vagrant/nfs
        state: directory
    - become: yes
      mount:
        path: /home/vagrant/nfs
        src: 192.168.110.10:/home/vagrant/nfs_shared
        fstype: nfs
        opts: nfsvers=4
        state: mounted
- hosts:
    - windows
  gather_facts: no
  tasks:
    - win_feature:
        name: nfs-client
        state: present
    - win_command: net use "z:" "\\192.168.110.10/home/vagrant/nfs_shared"
    - win_reboot:
>>> win_feature 에 대한 내용
>>> window 는 service 따로 mount 따로 할 필요 없이
>>> win_feature 로 nfs-client 를 설치후 바로 실행 가능하다


>> nfs_shared 가 생겼다 >> z 드라이브

▤ 폴더 생성시 권한이 없다

>> 권한을 777로 올려버리면 no_root_squash 랑 상관없다


#############
○ window node 는 .example.com 으로 하면 핑이 제대로 안된다
cfg.vm.host_name = "node6"cfg.vm.host_name = "node6.example.com"
'Ansible' 카테고리의 다른 글
| vagrant 백업 및 삭제 (0) | 2024.02.19 |
|---|---|
| windows nginx 실행 안된다 (0) | 2024.02.19 |
| Ansible 총 정리 (1) | 2024.02.15 |
| Ansible 변수 추가내용 (0) | 2024.02.14 |
| yaml [ playbook ] (0) | 2024.02.13 |
